Simple fat melting and de-watering tank

Having a need to melt palm oil, fats and glycerol that has solidified in 20 litre drums, this tank was constructed. It can also double as a de-watering tank.
Contents
Overview

Burco boilers are used by many to melt solid fats but where fats are supplied in drums with small apertures, there is a need to melt the fat before it can be poured from the drum.
A 50 litre cylinder is just the right size to accommodate a 20 litre oil drums and the typical plastic tubs in which fats are often supplied.
To melt fat which has solidified in a drum, the tank is partially filled with water and the drum placed inside to sit on three lugs. Oil could be used for this operation but things might get a little messy!
For dewatering, oil is poured directly into the tank using the heat and settle method. Being only 50 litre capacity, it’s probably too small to benefit from a pump and diffuser, but there’s no reason why the size can’t be increased or a pumping system fitted if the constructor so wishes. . See also KH's dewatering and filter unit.
On this build the heater was set off centre to allow the outlet to be “rodded” to keep it clear of BCBs (a facility which has proven most valuable in use), however, there’s no reason why the heater can’t be mounted on centre. This would make the construction considerably easer. Excellent instructions by Rotary-Motion, for mounting a heater flange can be followed here.
Preparing the cylinder

Ensure the cylinder is completely empty and remove the valve. On the cylinder shown, the thread was a right-handed 1” BSP taper (both male and female parts), but other cylinders may vary. The valve will be very tight and installed with a strong sealing compound which sets solid, but with perseverance and a set of 24” Stilsons can be removed. DO NOT APPLY HEAT to assist removal.
Once the valve is removed, stand the bottle upright and fill with water to expel all traces of gas.
The cylinder can now be emptied and cut to remove the bottom leaving the threaded connection in place to act as the drain. The cylinder shown was cut with an angle grinder and the edges cleaned up with a file.
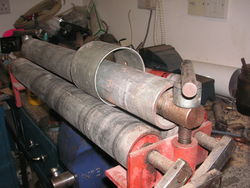
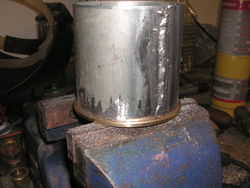
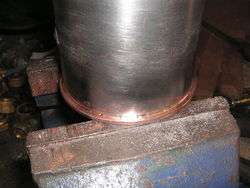
Rolling the heater tube
This was done on a set of small, home-made bending rolls, but a suitable size steel tube may be found or even carefully bent by hand. Once bent to the correct dimensions the tube is tacked on the inside and welded externally (please excuse the poor welding the writer was a bit out of practise!).
- Rolling the heater tube
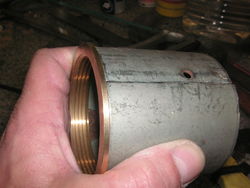


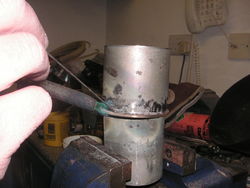
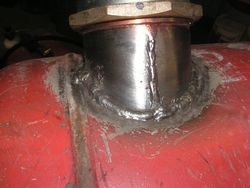
Fitting the heater flange
This flange was silver soldered, which allowed the heater tube to be welded to the cylinder later, but soft solder could be used if care is taken when welding or if the flange is soldered after welding has been carried out.
- Silver soldering the heater tube
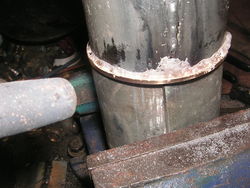


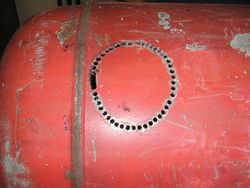
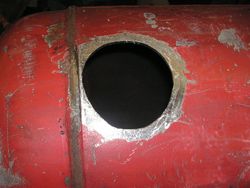
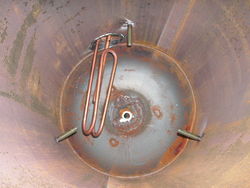
Fitting the heater tube to the tank
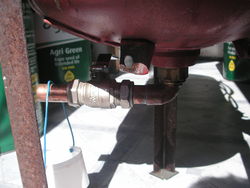
The heater needs to be mounted as low as possible in the tank to reduce the volume of cold liquid below the element. As the heater is offset from centre, an oval hole needs to be made. Due to the wall thickness of the cylinder the easiest way to cut the hole was to chain drill (no drills were harmed in the making of this tank!) and grind to size with a rotary file. The heater tube can then be welded in place (again, please excuse the tardy welding).
- Embarrassingly bad welding, but it functions ok!


Finishing the tank
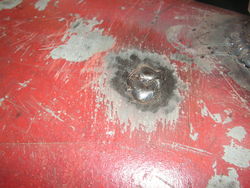
With a 50 litre cylinder, the rims of plastic tubs will sit conveniently on the edge of the tank, but three lugs will need to be fitted to support 20 litre drums. These are simply 50mm lengths of steel rod about 10mm diameter, fitted through holes drilled in the cylinder and seal welded externally. To melt fat in drums, the tank is filled with water. A short run of weld can be put on the inside of the tank to mark the appropriate fill level.
A valved drain is fitted to the original outlet, with the valve as close as possible to the tank.
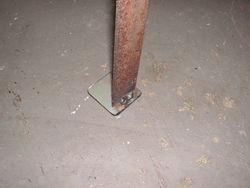
Three legs, cut from 1” angle, were welded to the cylinder. Little pads tacked to the ends to prevent the legs digging into the floor.
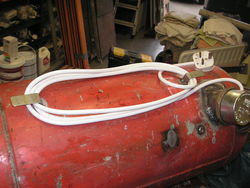
A couple of brackets can be welded to the tank to hold the heater cable when not in use, and, although not fitted to this build, a couple of handles welded to the tank would be of great benefit.
- Finishing touches.


Using the tank

On the unit shown, setting the immersion heater thermostat to 65°C has proved to be satisfactory. To melt fat in drums or tubs, fill with water to the appropriate level, switch on and allow the heat to soak into the contents of the drum.
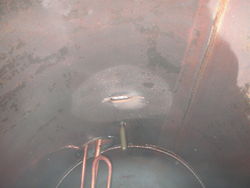
It is possible to fill the tank with water to the point where the drums will float. But the three internal rods should still be fitted to prevent the drums hitting the heater element.
For dewatering by the settling method, the tank is simply filled with oil and heated, left to settle and then water drained off via the valve. With the arrangement shown there is quite a large volume below the heater level which requires mixing with a suitable stick.
Improvements and drawbacks
While performing reasonably well, there are several improvements which could be made.
- Handles welded to the side of the tank would be a distinct benefit if the tank is to be moved around.
- Some sort of arrangement to reduce the volume of cold oil beneath the heating element would be an advantage.
- When used for melting fat in a drum, air can be trapped in the recess formed by the lower seam of the drum, insulating the bottom face. An ‘inverted walking stick’ shaped piece of small bore pipe could be used to vent the air, however, at the time of writing this has yet to be tried.
Bio-rich-time-poor 13:35, 29 May 2011 (BST)